KM717 – combination of WK717 (wireless keyboard) and WM527 (wireless mouse)

WK717 – Wireless keyboard
WM527 – Wireless mouse
Dell Universal Radio Frequency (RF) 2.4Ghz and Bluetooth 4.0 / Bluetooth Low Energy (BLE) Features
Insert the batteries included with the keyboard or mouse. For more information on how to install the batteries, refer to the document that came with the device or browse to the Dell Premier Wireless Keyboard and Mouse KM717 Quick Start Guide or Dell Premier Wireless Mouse WM527 Quick Start Guide on how to install the batteries.
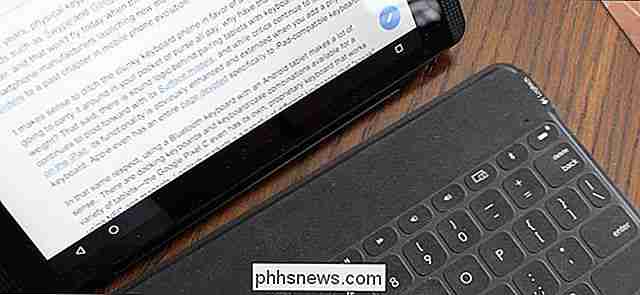
Locate the wireless USB receiver that came with your keyboard or mouse. Note: When buying a keyboard or mouse with a computer: Look in every compartment of the box that the device(s) came in. The wireless USB receiver is small and can be easily over looked. The receiver will have a informational tag attached to help you locate the receiver. Refer to Figure 1 to see the size and shape of the receiver. When buying a keyboard or mouse separately from a computer: The wireless USB receiver will be under the keyboard when buying a keyboard or keyboard, mouse combination, and under the mouse when bought separately. The receiver will have a informational tag attached to help you locate the receiver. Refer to Figure 2 for the typical location, size and shape of the receiver.
Figure 1: Wireless Receive
Figure 2: Wireless Receiver Location in Packaging When you cannot locate your wireless receiver after you have unpacked the devices, some mice and keyboards have a place to store the wireless receiver. Look under the mouse buttons where the batteries are or in the battery compartment on a keyboards, but they are not shipped in those locations.
Insert the wireless USB receiver as shown in Figure 2.
Figure 2: Wireless USB Receiver Insertion Note: The receiver only goes in one way. When the connector does not seem to fit, adjust the angle or flip it over. The receiver only goes in one way. When the connector does not seem to fit, adjust the angle or flip it over.
Make sure the mouse is turned on (Figure 3).
Figure 3: Wireless Mouse On Switch Location
Make sure the keyboard is turned on (Figure 4).
Figure 4: Wireless Keyboard On Switch Location
The selection of the wireless mode on the mouse is made by pressing the selection icon on the top of the mouse (Figure 5).
Figure 5: Wireless Mouse Selection Switch Location
The selection of the wireless mode on the keyboard is made by sliding the wireless mode selector on the front of the keyboard (Figure 6).
Figure 6: Wireless Keyboard Selection Switch Location
When using the RF 2.4Ghz connection, you have to use the dongle that comes with the keyboard or mouse. Notes: Make sure the receiver has the Dell Universal symbol on it. The receiver is not compatible with Bluetooth or Logitech’s Unifying devices. The Bluetooth on the keyboard and mouse uses a Low Energy (BLE), which only works with Bluetooth devices using the chipset/module 4.0 and above on the computer, also it works best with Windows Operating System 8.0 and above. The wireless keyboard and mouse range is 30 feet (10m) maximum, however the wireless strength can be affected by weak batteries, any other wireless devices nearby, placement of dongle in computer, etc.
Common Wireless Failures and Recommendations
The WK717 and WM527 come with dual wireless connections. Which means each keyboard and mouse have a single RF 2.4Ghz connection and two Bluetooth 4.0 / BLE connections, which can be selected on the WK717 and WM527.
My Mouse or Keyboard stopped responding
The Dell WK717 and WM527 should automatically work with the computer when set to the RF 2.4Ghz connection . When the mouse or keyboard fails to work, it could be due to one the follow reasons;
Battery Weak batteries.
Recommended solution: Install new batteries.
Wrong orientation of batteries.
Recommended solution: Check batteries orientation.
Make sure the keyboard or mouse power button is set to ON.
Wrong selection of wireless mode made on the keyboard or mouse.
Recommended solution: Check and select the correct wireless connection mode on the keyboard or mouse. Notes: Select on the keyboard/mouse if you are using the dongle. Resynchronize with Dell Universal Pairing if needed. For more information refer to Dell Knowledge Base article How to use the Dell Universal Pairing. Select or for Bluetooth pairing. Remember which Bluetooth are paired with the system. Selecting the wrong Bluetooth will lead to either keyboard or mouse not functioning. Re-pair the devices, when needed. For more information refer to Dell Knowledge Base article Fix, Connect to and Learn About Bluetooth.
Recommended solution: Check and select the correct wireless connection mode on the keyboard or mouse. Wireless Dongle placement.
Recommended solution: Reinsert the dongle at the front or side of the system. This is because the system would have shield up and reduce the wireless strength. Bluetooth compatibility.
Recommended solution: Check system Bluetooth version and OS version. Keyboard and mouse are having Bluetooth Low Energy (BLE) which will not work on Bluetooth chipset/module 4.0 or below on the system/computer. For compatibility of Bluetooth list, please refer to individual product (KM717, WK717 or WM527). It also works best on Windows OS 8.0 and above.
Note: Sometimes a non-working mouse or keyboard can be caused by other factors like a bad USB port or a bad system Bluetooth chipset or a program crash that could cause the system to hang-up and freezes the keyboard and mouse. For more information troubleshooting USB port issues, refer to Dell Knowledge Base article Sometimes a non-working mouse or keyboard can be caused by other factors like a bad USB port or a bad system Bluetooth chipset or a program crash that could cause the system to hang-up and freezes the keyboard and mouse. For more information troubleshooting USB port issues, refer to Dell Knowledge Base article How to resolve USB port issues
My Bluetooth keyboard and mouse do not reconnect to my computer after being idle. How do I reconnect my keyboard and mouse?
Select the tab that corresponds to the Operating System installed on your computer, and follow the steps.
El artículo más popular

El último artículo


Leave a Comment